3D modeling with Terramonitor
Combination of satellite image and elevation model brings new viewpoints to landscape. Terramonitor maps together with an elevation model enable simple 3D visualization.

Combination of satellite image and elevation model brings new viewpoints to landscape. Terramonitor maps together with an elevation model enable simple 3D visualization. Read more to find out how easy it is...
Only five steps to achieve the goal:
Step 1. Select an area
Step 2. Download an elevation model
Step 3. Open Terramonitor maps and the elevation model in QGIS
Step 4. Create 3D visualization
Step 5. Enjoy the model
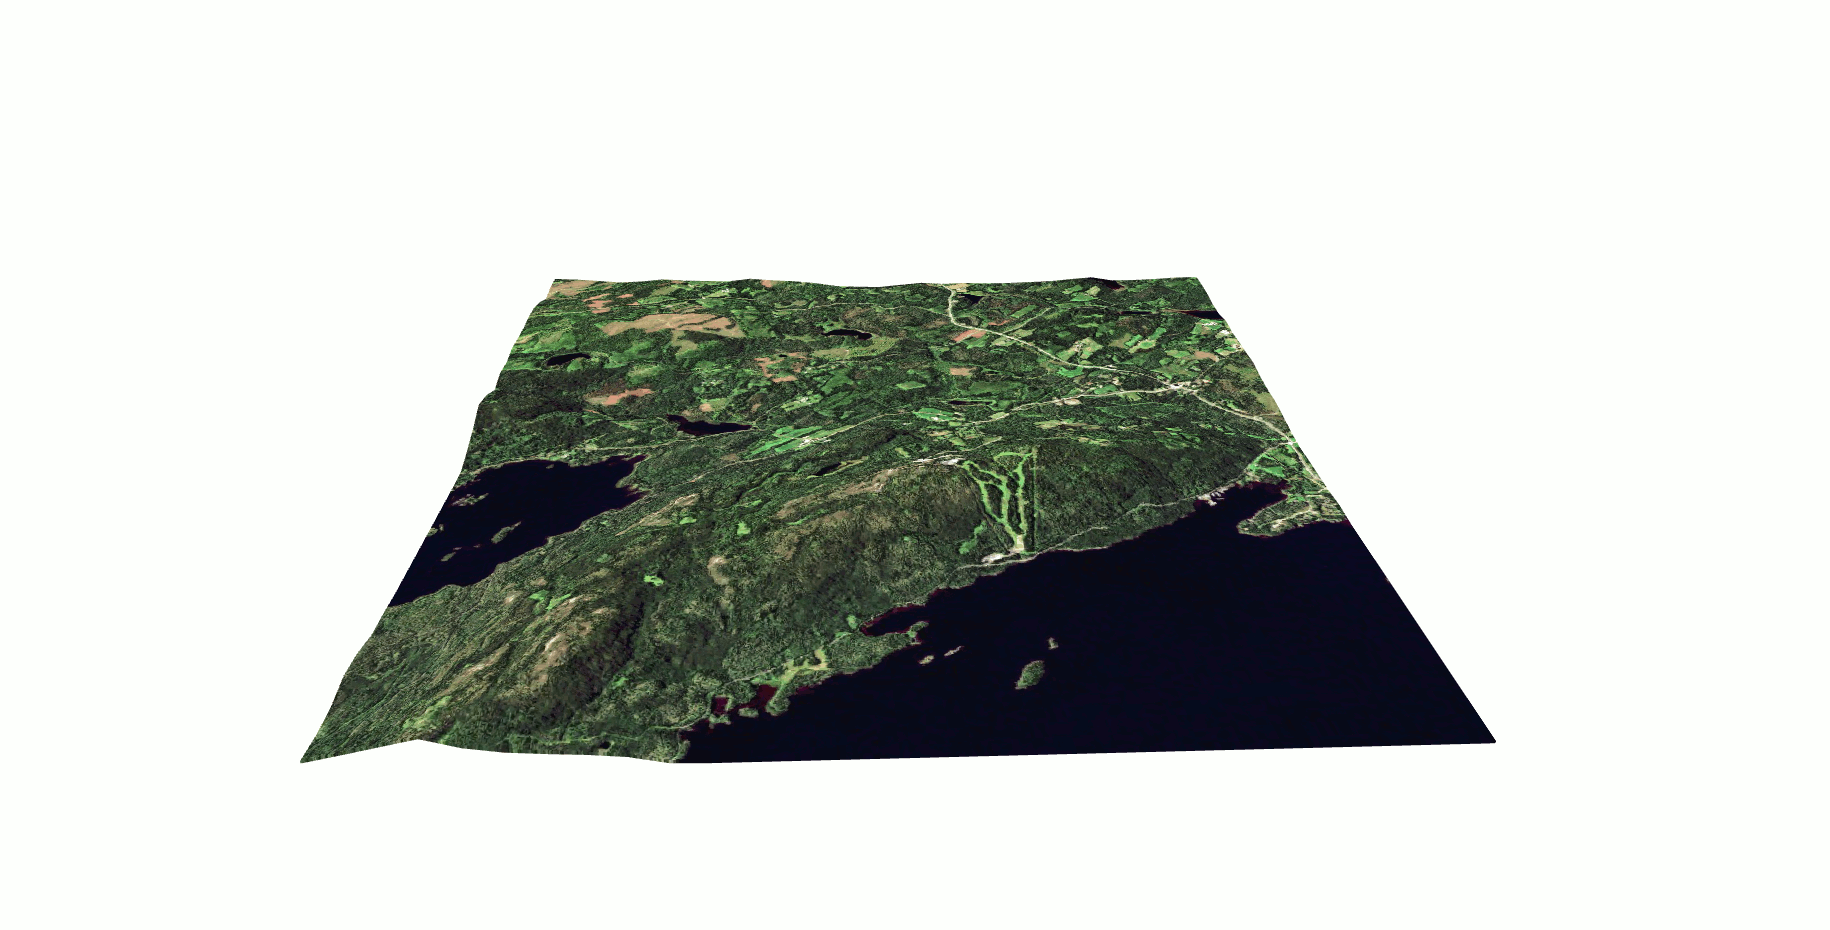
Example: Koli as 3D-model
Step 1. Select an area
In my opinion this is the most important step. You can't even start the process, if you don't know the area.
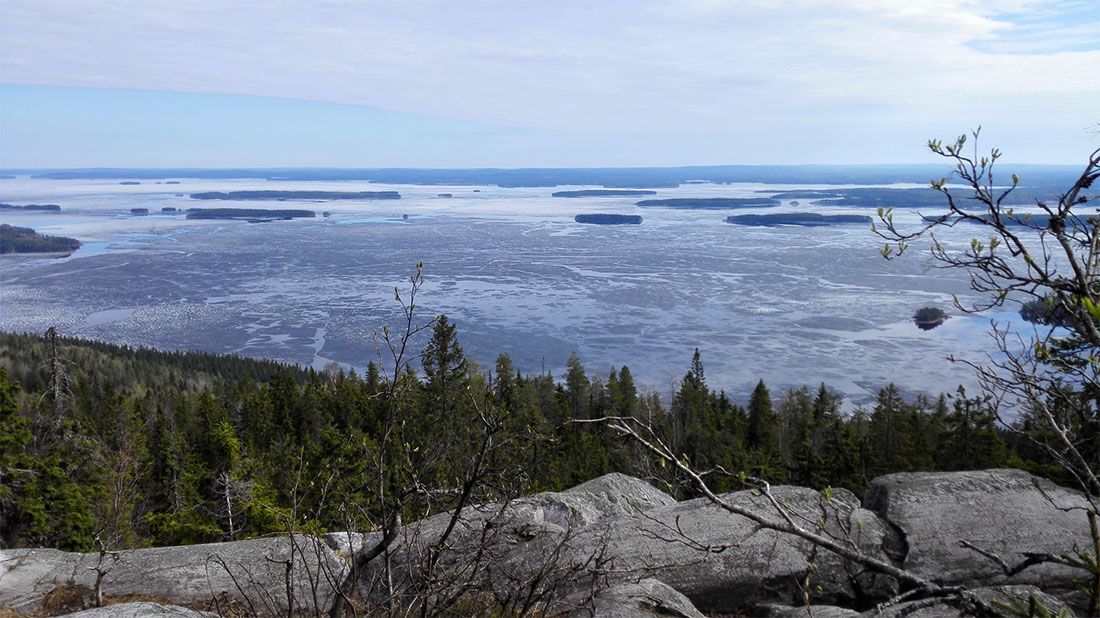
I wanted to create 3D-model from Koli National Park in Lieksa, Eastern Finland. For those, who have no idea about Koli: It is known for its iconic landscape of Finland. The elevation of the highest peak is 354 metres and it offers a beautiful view over Lake Pielinen. If you didn't already figure out, the image above is from Koli.
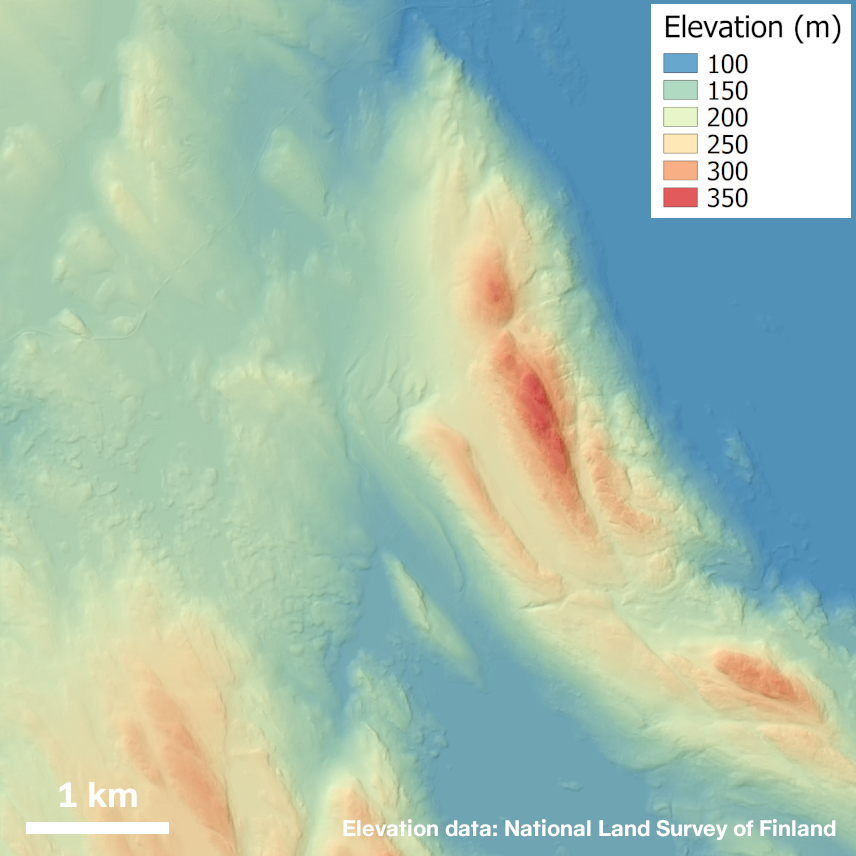
Step 2. Download an elevation model
After step 1, this is the second most important step. Elevation data has an essential role in creating the 3D model. In this example, I used open data file download service provided by National Land Survey of Finland. I chose a product of Elevation model 2 m. As the name implies, the pixel size of the elevation model is 2 meters.
If you are interested in creating your own 3D visualization outside Finland, check out SRTM Tile Downloader, which offers elevation data with 30 meter resolution from the Shuttle Radar Topography Mission.
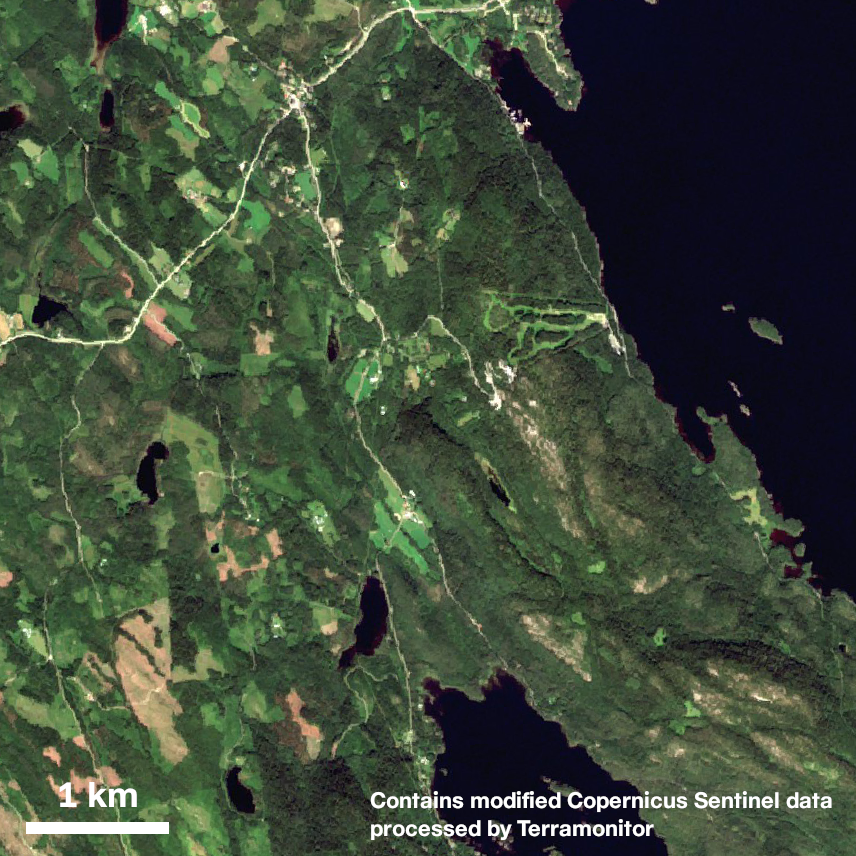
Step 3. Open Terramonitor maps and the elevation model in QGIS
Now, I have decided the area and downloaded the important elevation model. The rest of the steps are really easy. To create 3D-model I used QGIS 3 (my version was 3.2.0) as it includes direct support for 3D visualization. I opened as layers the elevation model and Terramonitor maps. Terramonitor maps can be easily integrated as WMS or WMTS to QGIS (check out WMS and WMTS integration quick guide). If you don’t have Terramonitor maps yet, you can register here.
Step 4. Create 3D visualization
In this step, I created the actual 3D visualization. First, I selected from main menu View > New 3D Map View, which opens a new window of 3D canvas. Next I had to make 3D configuration (tool icon in top-left corner). Only selecting the elevation model is needed. You don’t have to do anything else unless you want to. I also modified vertical scale to emphasize the land shape.
Step 5. Enjoy the model
This is the last step, but not least, remember to enjoy the awesome 3D-model!